When you want to create PDF documents from the Autodesk/AutoCAD/Revit products there are some parameters, you can use to optimize the PDF creation.
Depending on what you are printing or plotting the size of the resulting PDF may vary a lot. Especially drawings containing rasterized images or scanned images with a lot of noise dots will create huge print jobs and therefore large PDF files. If you are facing a size or performance issues, there are a couple of tricks that you can use.
- Lower the DPI of the printer.
- Change the raster graphics settings in your plotter configuration.
- Reduce the paper size.
The information that goes into a PDF is a product of these settings. If you lower the DPI the 50% of what it was before then your document will typically become 4 times smaller. If you keep the DPI but doubles the paper size then the size of the print job is also approximately twice the size.
Sometimes the operating system and the printer drivers used by the PDF printer will also have an effect on size.
Here is a list of steps you can take to reduce the PDF size produced by AutoCAD.
Open the print dialog
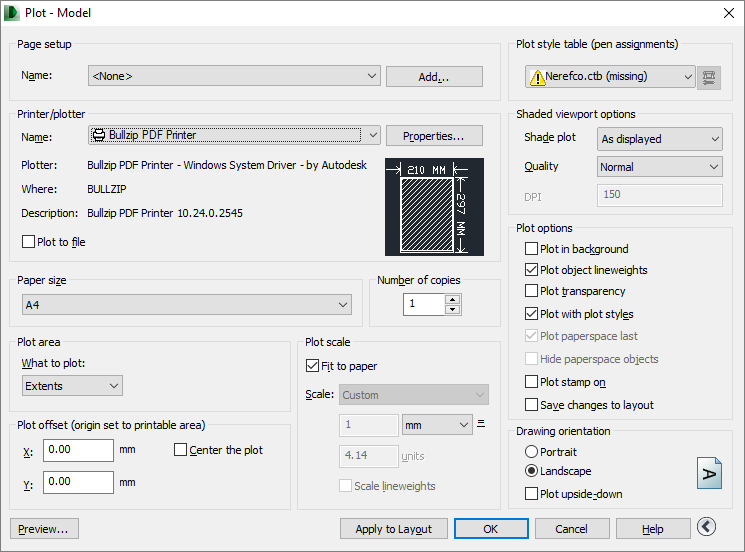
First you open the print dialog and select the Bullzip PDF Printer. Then you click the Properties button to change the printer properties.

Raster Graphics
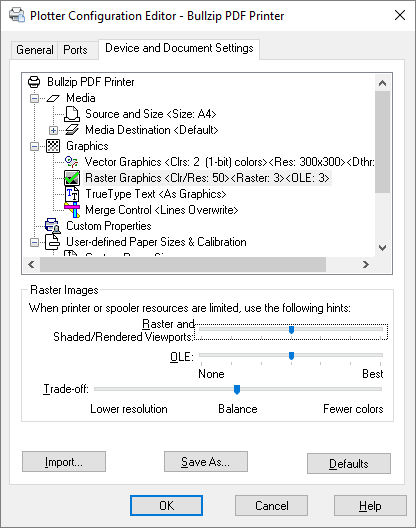
In the Plotter Configuration Editor, you can lower the raster image quality to a suitable value for your scenario. Try setting them to half the maximum value as shown here.

Change the DPI setting
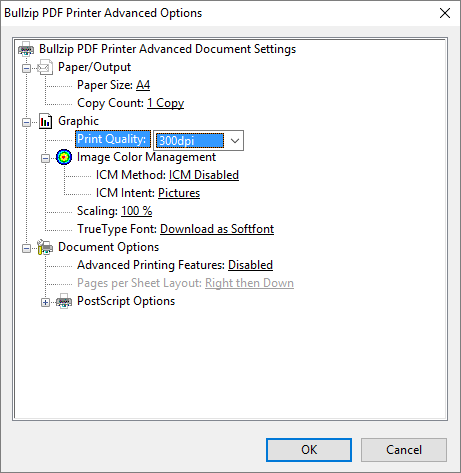
After that you can click the Custom Properties and change the DPI. Lowering the DPI will potentially reduce the quality of the output. However, it may not mean much depending on what your PDF should be used for.

Save the plotter configuration
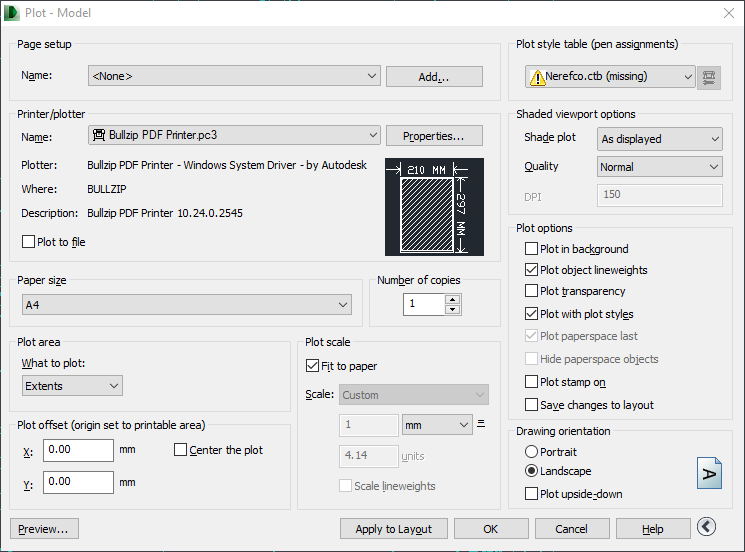
When you have found your preferred combination of settings, you can save the plotter configuration to a file and select that the next time you want to print to PDF. In the dialog shown here, the plotter name is now my PC3 file with all the settings.
